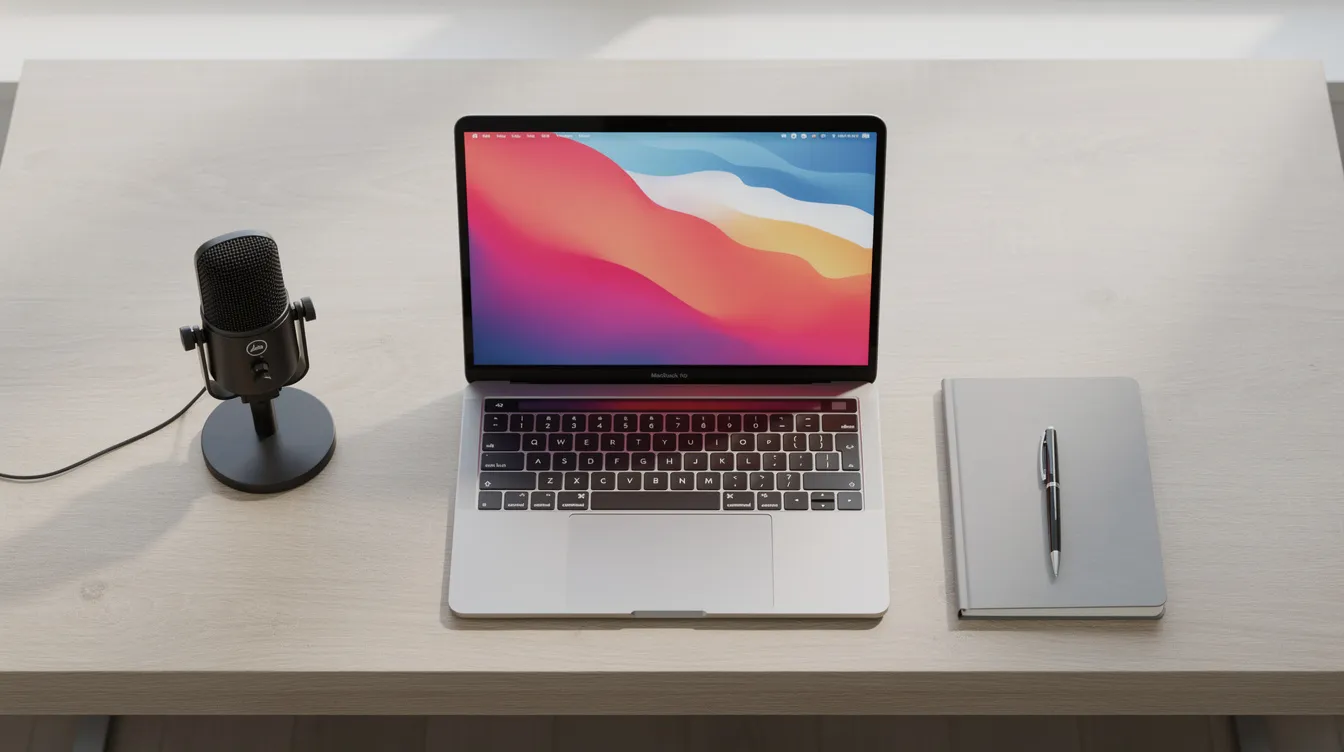
To screen capture video on a Mac, press the shortcut Shift-Command-5. This opens the on-screen capture controls, where you can choose to record your entire screen or a selected portion. For more control, including microphone audio and professional editing, you can use the QuickTime Player app or a dedicated screen recorder.
The Fastest Method: The Built-in Capture Tool (Shift-Command-5)
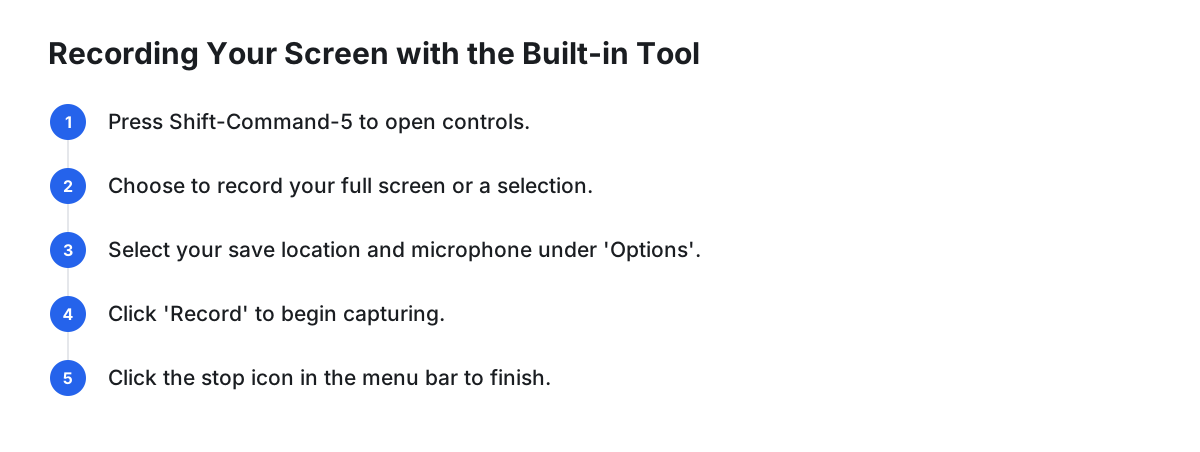
The quickest way to start a screen recording is by using the keyboard shortcut built directly into macOS. This method is ideal for fast, simple captures that don't require editing or high production value.
Here’s the step-by-step process:
- Press Shift-Command-5: This key combination will open the capture toolbar at the bottom of your screen. You'll see a set of controls for taking both screenshots and video recordings.
- Choose Your Recording Area: Look for the two video icons in the toolbar. The icon with a solid outline records your entire screen, while the one with a dotted outline allows you to record a selected portion. If you choose the latter, a resizable box will appear for you to position over the area you want to capture.
- Check Your Options: Before recording, click the “Options” button. Here, you can choose where to save the final video file (like your Desktop or Documents folder) and select a microphone if you want to record your voice.
- Start Recording: Click the “Record” button. If you're recording the full screen, your entire display will be captured. If you chose a portion, only the area within the box will be recorded.
- Stop Recording: A small stop icon (a circle with a square inside) will appear in the menu bar at the top of your screen. Click this icon to end the recording. You can also press Command-Control-Escape.
Once you stop, a thumbnail of the video will appear in the bottom-right corner. You can click it to trim the beginning or end before it saves automatically.
The Trade-off: While fast, this method is very basic. It saves files as large .mov files, cannot capture your Mac’s internal system audio, and the editing options are limited to simple trimming.
The Classic Method: Using QuickTime Player
For slightly more control, you can use QuickTime Player, the video application that comes pre-installed on every Mac. It offers a similar recording function but presents it within a familiar application window.
How to record with QuickTime Player:
- Open QuickTime Player: You can find it in your Applications folder or by searching with Spotlight (Command-Space).
- Start a New Recording: With QuickTime open, go to the menu bar at the top of the screen and click
File > New Screen Recording. - Select Options: This will open the same on-screen controls described in the previous method. Using it via QuickTime ensures the file is managed by the app. Click the arrow next to the red record button to select your microphone.
- Record and Stop: Click the red record button to begin. You can either click once to record the entire screen or drag a box to select a specific area and then click “Start Recording.” To stop, click the stop icon in the menu bar.
- Save Your File: Unlike the direct shortcut, QuickTime will open the recording in a new window. You must manually save the file by going to
File > Saveand choosing a name and location. This gives you a chance to review the video before saving it.
The Trade-off: QuickTime Player shares the same core limitations as the direct keyboard shortcut. It doesn't capture system audio and lacks any real editing tools beyond trimming, splitting, or rotating clips.
For Polished Results: Professional Screen Recorders
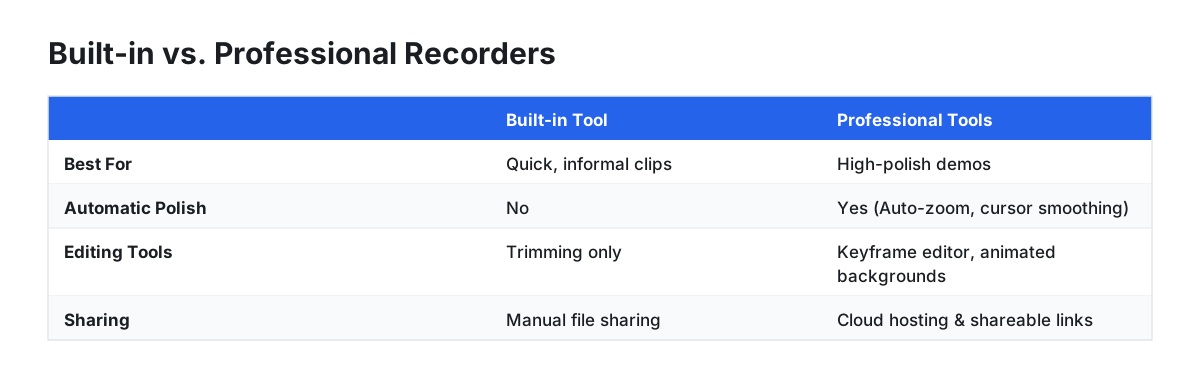
The built-in tools are great for quick captures, but they produce raw footage that can be jerky and hard to follow. For creating polished tutorials, product demos, or any video where clarity matters, a dedicated screen recorder is a necessity. These tools add automated effects, provide better editing, and offer more sharing options.
Here's a comparison of a few leading options for macOS:
Cinemak
Cinemak is a recorder focused on automating the post-production process. Its key differentiator is that it automatically polishes recordings the moment you stop, adding smooth cursor movements and dynamic zooms to highlight areas of action. This eliminates hours of manual editing.
- Ideal User: Founders, product teams, and creators who need to produce high-quality demos and tutorials quickly, without becoming video editors.
- Key Features: Automatic zoom and cursor smoothing, custom animated backgrounds, 4K/60fps export. The core app is free for unlimited recording and local exporting.
- Pricing: The recorder is free. The paid Cinemak Cloud plan ($9/mo) adds video hosting, analytics, and shareable links.
As shown above, features like auto-zoom follow your cursor to guide the viewer's focus without any manual keyframing.
Screen Studio
Screen Studio is another popular option that focuses on creating visually appealing screen recordings with minimal effort. It also applies automatic zooms and smoothing, and adds a characteristic background and mouse click animations.
- Ideal User: Marketers and social media creators focused on creating short, engaging videos that stand out visually.
- Key Features: Automatic zooms, motion blur, customizable backgrounds, and easy social media exporting.
- Pricing: A one-time purchase, typically around $99 for a lifetime license.
Loom
Loom is a platform built for asynchronous team communication. While it has a robust screen recorder, its main strength is the ecosystem around it: fast cloud uploads, shareable links, transcripts, and team collaboration features.
- Ideal User: Teams who use video for internal communication, bug reports, and feedback, where speed of sharing is more important than production value.
- Key Features: Instant cloud upload and link sharing, webcam recording overlay, AI-powered summaries and filler word removal.
- Pricing: A free plan with limitations on video length and count. Paid plans start at around $12.50/user/month.
Mac Screen Recording Tools: A Comparison
| Feature | Built-in Capture Tool | Cinemak | Screen Studio | Loom |
|---|---|---|---|---|
| Best For | Quick, informal clips | Automated high-polish demos | Stylish social media videos | Fast team communication |
| Cost | Free (Built-in) | Free (Recorder), Paid (Cloud) | One-time fee | Subscription |
| Automatic Polish | No | Yes (Auto-zoom, cursor smoothing) | Yes (Auto-zoom, motion blur) | No |
| Editing Tools | Trimming only | Keyframe editor, animated backgrounds | Custom backgrounds, trimming | AI filler-word removal, trimming |
| Max Resolution | Screen dependent | 4K at 60fps | 4K | 4K |
| Sharing | Manual file sharing | Cloud hosting, analytics (Paid) | MP4 export | Instant shareable links |
For creators who need the polish of a professional tool without the recurring subscription fees for core recording features, Cinemak offers a powerful free entry point. If you need to produce high-quality tutorials or demos that are ready to publish in seconds, you can download Cinemak for free and skip the manual editing process entirely.
Managing Your Recordings: File Size and Format
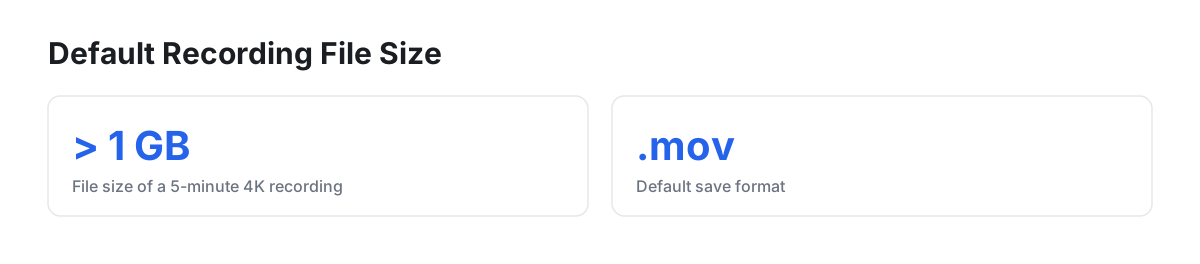
By default, your Mac saves screen recordings as .mov files. This is a high-quality format, but the files can become very large, especially if you're recording a high-resolution display for several minutes. A five-minute 4K recording can easily exceed 1 GB of disk space.
Here are a few tips for managing your video files:
- Check the File Size: Right-click on your saved video file and select “Get Info” to see its size.
- Compress Your Video: For sharing on the web or via email, you'll want to compress the file. A free tool like HandBrake is excellent for this. You can drag your
.movfile into HandBrake, choose a preset like “Fast 1080p30,” and convert it to a more universally compatible and smaller.mp4file. - Use a Tool with Better Export Options: Most professional screen recorders, including Cinemak, allow you to export directly to MP4, giving you more control over the final file size and quality from within the app.
FAQ
How do I stop a screen recording on a Mac?
A You can stop a screen recording in two ways: click the small stop icon (a circle with a square inside) that appears in the menu bar at the very top of your screen, or press the keyboard shortcut Command-Control-Escape.
Can I do a screen recording on my MacBook with sound?
A Yes, you can record your voice with the built-in microphone by selecting it in the 'Options' menu of the capture toolbar before you start. For recording your Mac's internal system audio, you need a third-party app. Expert Tip: Always do a short, 10-second test recording to check your microphone levels before recording your main content. This helps avoid issues with audio that is too quiet, loud, or distorted.
What button do I press to screen record on a Mac?
A The primary keyboard shortcut to start a screen recording on a Mac is Shift-Command-5. This command opens a control panel at the bottom of your screen with all the tools needed to capture your screen as a video or a static image.