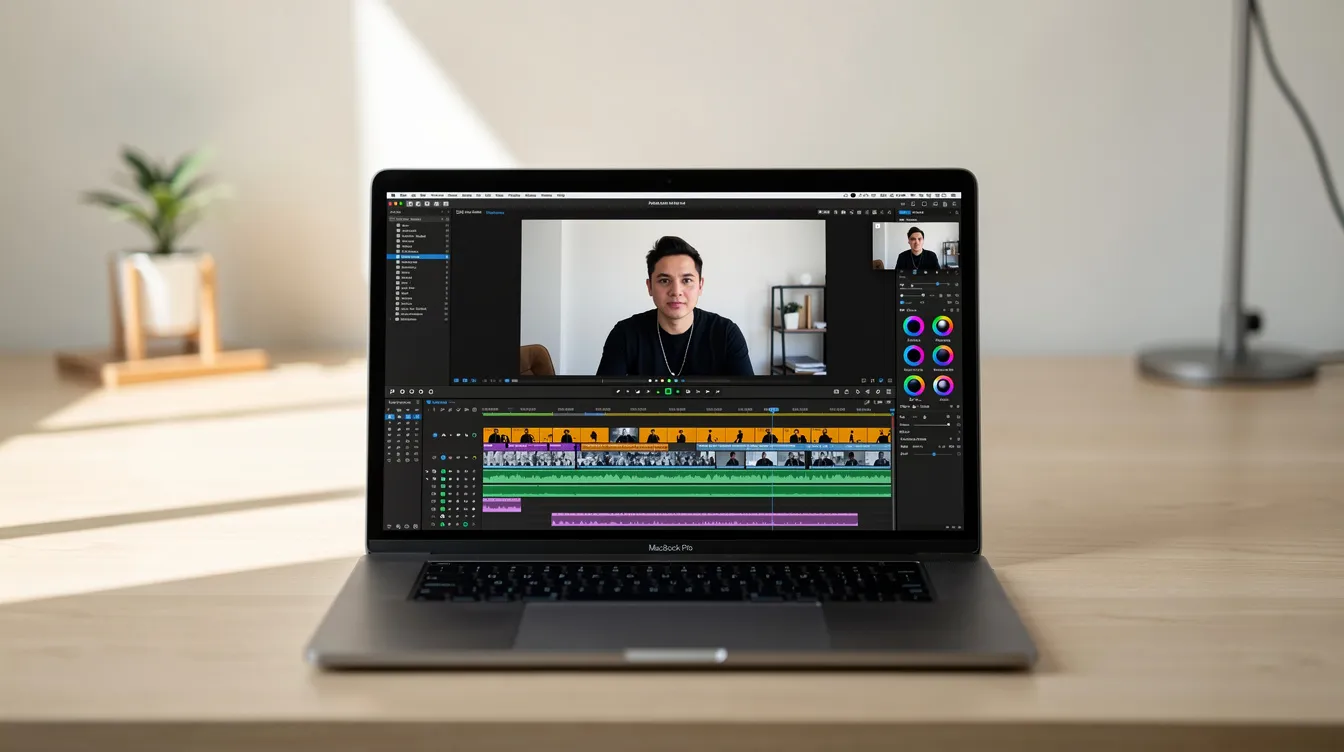
To screen record on a Mac, press Shift-Command-5 to open the built-in screen capture utility. This control panel lets you record your entire screen or a selected portion. Click 'Record' to start, and click the stop icon in the menu bar or press Command-Control-Escape to finish the recording.
How to Use Mac’s Built-in Screen Recorders
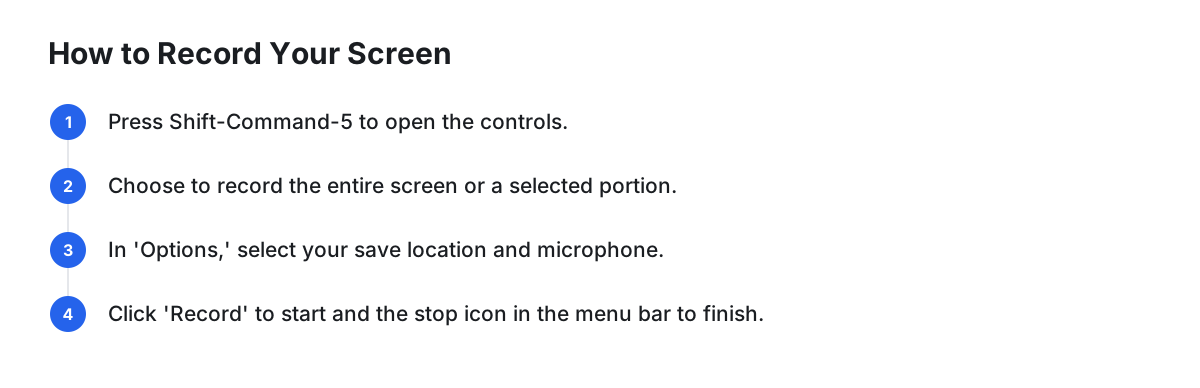
Your Mac comes with two free, easy-to-use methods for screen recording right out of the box: the Screenshot utility and QuickTime Player. They are perfect for quick, simple captures.
Method 1: The Screenshot Utility (Shift-Command-5)
The fastest way to start a recording is with the keyboard shortcut Shift-Command-5. This command opens a small control panel at the bottom of your screen.
- Open the Controls: Press Shift-Command-5.
- Select Recording Area: Choose either the icon to 'Record Entire Screen' (a screen with a solid border) or 'Record Selected Portion' (a screen with a dotted border). If you choose the latter, drag the box to select the area you want to capture.
- Configure Options: Click the 'Options' menu. Here you can set a save location, a countdown timer, and, importantly, select a microphone if you want to record your voice.
- Start and Stop: Click the 'Record' button. To stop, click the small stop button (a circle with a square) that appears in your top menu bar, or press Command-Control-Escape.
Method 2: QuickTime Player
QuickTime Player offers a slightly different workflow, especially for including your webcam.
- Open QuickTime Player from your Applications folder.
- Go to the menu bar and select File > New Screen Recording. This will open the same controls as the Shift-Command-5 shortcut.
- Configure your settings and record as described above.
- When you stop, the recording automatically opens in a QuickTime window, ready for a quick trim (
Command-T) before you save it.
How to Record Your Screen and Webcam Simultaneously
For tutorials, presentations, or product demos, you often need to record your screen and your face from the webcam at the same time. You can achieve this using QuickTime Player.
- Open QuickTime Player.
- Start your screen recording first by going to File > New Screen Recording. Set your options and begin recording your screen.
- While the screen is recording, go back to the QuickTime Player icon in your Dock, right-click (or control-click) it, and select New Movie Recording.
- A new window will appear showing your FaceTime camera feed. By default, this window will 'float' on top of all other windows.
- Resize and position the webcam window where you want it (e.g., in the bottom-right corner).
- This webcam video is not being recorded into the same file. It's simply a live preview that will be captured as part of your main screen recording.
- When you're finished, stop the screen recording. The resulting video will have your webcam feed embedded in it.
How to Record Screen with Internal System Audio
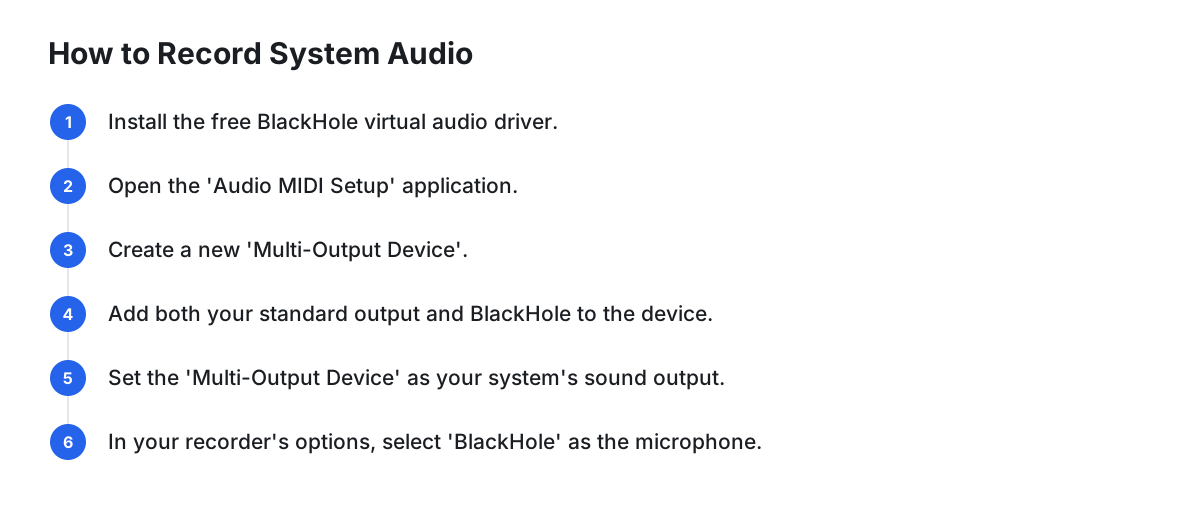
The built-in Mac recorders can capture microphone audio, but they cannot record your computer's internal audio (e.g., sound from a YouTube video or a game) by default. The most popular free solution is a tool called BlackHole.
While it requires a one-time setup, it's a powerful way to enable system audio recording for free.
- Install BlackHole: Download and install the free BlackHole virtual audio driver from Existential Audio.
- Open Audio MIDI Setup: Search for "Audio MIDI Setup" in Spotlight and open it.
- Create a Multi-Output Device: Click the
+button in the bottom-left corner and select 'Create Multi-Output Device'. - Configure the Device: In the new Multi-Output Device, check the boxes for both your Mac's standard output (e.g., 'MacBook Pro Speakers') and 'BlackHole'. Ensure your primary output is set as the 'Master Device' and check 'Drift Correction' for BlackHole.
- Set System Output: Go to System Settings > Sound. Under 'Output', select your newly created 'Multi-Output Device'. Now your Mac's audio will play through your speakers and be routed to BlackHole simultaneously.
- Record in QuickTime: Start a new screen recording. In the 'Options' menu, select 'BlackHole' as your microphone. Your recording will now capture all system sounds.
Limitations of Mac's Built-in Tools
While convenient, the native recorders have significant limitations for serious work:
- No Internal Audio: As discussed, recording system sound requires a complex workaround.
- Limited Editing: You can only trim the beginning and end of a clip. There are no tools for adding text, zooming, or cutting sections.
- Large File Sizes: Recordings are saved as .mov files, which can be very large, making them difficult to share or store.
- No Post-Production: There are no features to polish the final video, such as smoothing cursor movement or adding effects.
These limitations lead many users to seek more powerful third-party applications.
The Best Screen Recorders for Mac: A Comparison
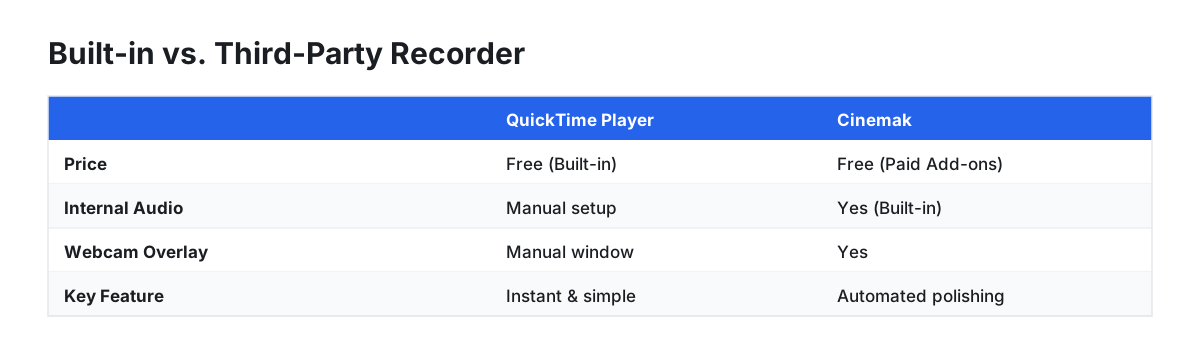
For professional results, you'll need a dedicated tool. Here’s how the best options stack up.
| Feature | QuickTime Player | OBS Studio | Loom | Cinemak | ScreenFlow |
|---|---|---|---|---|---|
| Price | Free (Built-in) | Free (Open Source) | Freemium ($12.50/mo) | Free (Paid Add-ons) | $169 (One-time) |
| Internal Audio | Manual setup | Yes (Advanced) | Yes | Yes (Built-in) | Yes |
| Webcam Overlay | Manual window | Yes (as a source) | Yes (Automatic) | Yes | Yes |
| Max Resolution | 4K / 30fps | System Dependent | 4K | 4K / 60fps | System Dependent |
| Key Feature | Instant & simple | Ultimate control | Fast async sharing | Automated polishing | All-in-one editor |
1. Cinemak: For Automated Professional Polish
Cinemak is a modern recorder designed to produce a polished video with minimal effort. Its standout feature is what happens after you record: it automatically applies effects like cursor smoothing, dynamic zoom on clicks, and custom backgrounds. This saves hours of manual editing.
The free version is incredibly generous, offering unlimited recording, editing, and local export at up to 4K / 60fps with no account required. It's an ideal choice for founders, marketers, and educators who need to create high-quality tutorials or demos without a background in video editing. Paid add-ons like Cinemak Cloud ($9/mo) provide hosting, analytics, and AI features like voice translation.
For creators who want polished results without the manual work, Cinemak's automated workflow is a game-changer. Download Cinemak for free and see the automated polish for yourself.
2. OBS Studio: The Power-User's Choice
OBS Studio is a free, open-source powerhouse for both recording and live streaming. It offers unparalleled control over your scenes, allowing you to mix multiple sources (screen, webcam, images, text) with professional transitions. However, this power comes with a steep learning curve; the interface can be intimidating for beginners.
3. Loom: For Quick Asynchronous Communication
Loom has cornered the market for quick, shareable video messages in a corporate setting. It's incredibly fast for recording your screen and webcam, automatically uploading the video and providing a shareable link. It's less of a tool for creating polished, edited content and more for quick feedback and team communication.
4. ScreenFlow: The All-in-One Recorder and Editor
ScreenFlow is a long-standing favorite among Mac professionals. It combines a high-quality screen recorder with a full-featured, timeline-based video editor. This allows you to record your screen and then immediately dive into a robust editing suite to add titles, callouts, and animations. It comes with a one-time price tag, making it a significant investment for serious video creators.
FAQ
How do I record a video with sound on my Mac?
To record your voice, press Shift-Command-5, click 'Options,' and select your microphone. To record the computer's internal audio, the easiest method is to use a third-party app like Cinemak or OBS Studio; otherwise, you must configure a free virtual audio driver like BlackHole for use with QuickTime.
What is the shortcut for screen capture on Mac?
The main shortcut is Shift-Command-5, which opens the control panel for both video screen recording and still screenshots. For a quick screenshot of your entire screen, you can also use Shift-Command-3.
How to screen record on Mac with internal sound?
The most straightforward way is with a dedicated app like Cinemak, ScreenFlow, or OBS. If you want to use the built-in tools, you must first install a free utility like BlackHole and configure a 'Multi-Output Device' in your Mac's Audio MIDI Setup to route system audio correctly.
How do I record my screen?
On a Mac, the quickest way is to press Shift-Command-5, choose whether to record the full screen or a selected area, and click 'Record'. When finished, click the stop icon in the menu bar to save your video.